


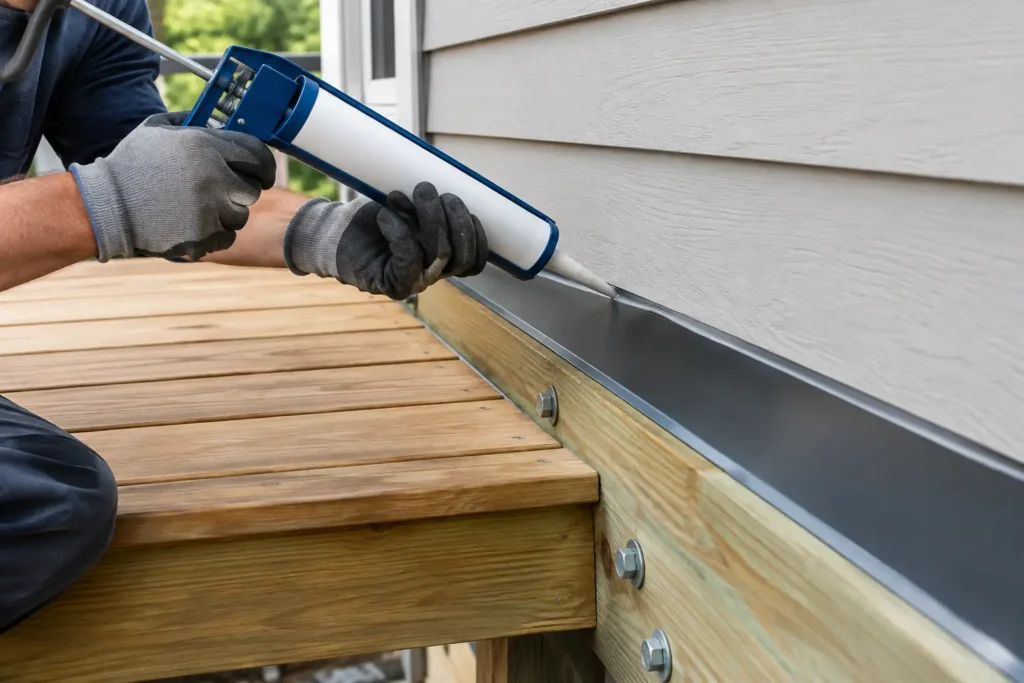
A deck ledger is one of the most consequential connections on your home. It carries a major share of the deck load, but its failure usually starts with something quieter than a structural crack: rainwater getting behind the siding.
Knowing how to seal deck ledger connections correctly means understanding that caulk alone is not the answer. The goal is to create a layered drainage path that sends water back out, not trap it against the house.
In Seattle-area homes, that distinction matters. Persistent rain can expose even a small gap at the top of a ledger, eventually wetting framing, sheathing, insulation, and interior finishes. By the time rot is visible from the deck surface, the repair may involve far more than replacing a board.
Start with the right goal: flashing, not a bead of sealant
The phrase “seal the ledger” can be misleading. A ledger should be protected by a flashing system integrated with the home’s water-resistive barrier, often called the WRB or housewrap. Sealant is useful at selected laps, penetrations, and transitions, but it should not be the primary defense against bulk water.
A reliable installation uses overlapping materials in the same direction water travels: from the wall above, over the flashing, and away from the house. If one layer leaks, the layer beneath it should still direct water outward. That is the same principle used for roofs, windows, and exterior doors.
The specific flashing details depend on the wall assembly. Fiber-cement siding, wood siding, brick veneer, stucco, stone, and manufactured veneer all require different approaches. A ledger attached over siding without addressing the wall system behind it is a common source of hidden water damage.
Inspect the wall before installing or resealing a ledger
Before adding flashing or sealant, inspect the connection closely. Look for soft decking near the house, staining on siding, swollen trim, rusting fasteners, loose ledger bolts, peeling paint, or a musty smell in the basement or crawlspace below. These are warning signs, not cosmetic issues.
If the deck is already built and the ledger area is covered by decking, removing a few boards near the house may be necessary to see what is happening. It is better to expose the connection than to apply a surface patch over active rot.
Pay close attention to the siding clearance. Deck boards should not be pressed tightly against the house, where leaves and debris can hold moisture. The gap needs to permit drainage and drying while still being covered appropriately by flashing.
The right clearance varies with siding type and local requirements, so this is a detail worth verifying during the project rather than guessing.
How to seal deck ledger flashing the right way
A proper retrofit or new installation usually requires access to the wall above the ledger. That often means removing a course or more of siding, not simply installing a metal cap from the deck side.
First, confirm that the ledger itself is structurally sound and properly attached to suitable house framing. A ledger should not be fastened through weak, decayed, or unsupported materials.
If there is rot behind it, the damaged framing and sheathing need repair before water-management details are restored.
Next, install or repair the water-resistive barrier behind the siding. Self-adhered flashing membrane can be used to bridge the wall plane and protect vulnerable areas, especially around fasteners and transitions. The membrane must be compatible with the wall’s WRB and any treated-lumber materials used at the ledger. Some membranes and sealants do not adhere well to wet, dusty, cold, or incompatible surfaces.
Then install corrosion-resistant metal Z-flashing over the top of the ledger. The vertical leg extends up the wall behind the WRB or properly lapped flashing membrane. The horizontal leg projects over the ledger and turns down at the face, creating a drip edge. That outward bend is important because it stops water from curling back beneath the flashing.
The siding above should be reinstalled with proper clearance from the flashing. Water needs room to escape. When siding is run tight to the metal, capillary action and debris buildup can keep the area wet.
Use sealant only where it supports the drainage system
High-quality exterior sealant may be needed at limited locations, such as flashing end dams, membrane edges specified by the manufacturer, or penetrations that cannot be protected by a lap. Use a sealant rated for exterior movement, moisture exposure, and the materials involved.
Do not run a continuous bead that blocks the bottom edge of flashing or creates a dam behind the ledger. Water that gets behind the siding must have a path out. A sealed-looking detail can fail faster if it prevents drainage.
Do not overlook fasteners and hardware
Ledger bolts, lag screws, structural screws, tension ties, and joist hangers all create potential moisture and corrosion concerns. Hardware should be rated for exterior use and compatible with pressure-treated lumber. Incompatible metals can corrode prematurely, particularly where moisture remains trapped.
Every structural fastener should follow the approved fastening schedule for the deck design and local code. Spacing, edge distance, fastener length, and framing configuration affect both strength and water resistance.
A ledger that is well flashed but improperly attached is still unsafe.
For decks with a waterproof membrane, covered ceiling, or low-clearance drainage system beneath, plan the ledger details before the deck surface is installed. Trying to add critical flashing after decking, railings, and under-deck finishes are complete can turn a straightforward detail into a disruptive repair.
Common ledger-sealing mistakes
The most expensive problems are usually caused by shortcuts that look acceptable on day one. Watch for these recurring issues:
- Caulk applied at the top of the ledger with no properly lapped flashing behind the siding.
- Flashing installed over the siding instead of integrated behind it.
- Deck boards installed tightly against the wall, leaving no drying or drainage space.
- A ledger fastened through existing rot, old siding, or unsupported wall areas.
- Aluminum flashing in direct contact with certain pressure-treated lumber, which can accelerate corrosion.
- No drip edge at the face of the flashing, allowing water to run back toward the wall.
- A surface patch added without opening the wall enough to inspect sheathing and framing.
One detail deserves special attention: brick and stone veneer. A deck ledger generally should not be supported by a veneer surface. Veneer is not structural framing, and fastening through it can create both load and water-management problems.
These projects often need a different support strategy, such as freestanding deck framing, depending on the home and local requirements.
When a repair becomes a replacement decision
If the ledger area has minor surface deterioration and the wall framing is dry and solid, a targeted flashing repair may be enough. If there is widespread rot, loose attachment, water staining inside the home, or significant deterioration of rim framing, the deck may need partial or full reconstruction.
This is where a detailed onsite review saves money. The right scope should identify what can be preserved, what must be opened, and what materials are needed to rebuild the connection correctly. A low repair price is not a good value if it leaves wet framing hidden behind new trim and fresh caulk.
Seattle Fence and Decks evaluates deck repairs with Pacific Northwest moisture exposure in mind, including the wall conditions that can affect a deck long after the visible boards are replaced. Clear scope, appropriate materials, and proper flashing are what keep a repair from becoming a repeat problem.
Know when to call a qualified deck contractor
Homeowners can often keep ledger areas cleaner by removing leaf buildup, checking flashing after storms, and maintaining siding and finish coatings. But opening a wall, assessing structural attachment, and rebuilding a ledger connection is not a good place for trial-and-error work.
A qualified contractor can evaluate the deck framing, siding system, drainage plane, flashing compatibility, and permit requirements as one connected assembly.
For homes in Seattle, Bellevue, Redmond, and surrounding communities, that local experience matters because wet conditions reveal weak details quickly.
If your deck feels soft near the house, shows staining at the ledger, or has flashing that ends at the siding face, schedule an onsite estimate before the next rainy season turns a manageable repair into concealed structural damage. Call Kevin at (425) 449-6739 to discuss a deck repair or replacement built to last.
How to anchor a ledger board?
Anchor a ledger board to sound house framing using approved structural fasteners and the required spacing. Follow local building codes and the deck design for proper attachment.
Do you seal the bottom of a deck?
The bottom of a deck should not be completely sealed. Proper drainage and airflow help prevent trapped moisture, rot, and premature deterioration.
What are common problems with ledger boards?
Common problems include water intrusion, improper flashing, loose or incorrect fasteners, wood rot, poor drainage, and attaching the ledger to weak or unsupported materials.
Does a deck ledger board need to be one piece?
Not necessarily. A ledger can consist of multiple properly joined sections when the design and fastening method allow it. Each section must be securely attached to suitable structural framing.
2 Comments